As an Amazon Associate I earn from qualifying purchases through links from this site. See the disclosure page for details.
Recently, a rumble in the engine alerted me to the fact that my exhaust needed attention. Sitting in my workshop, I was wondering whether I could save some cash and repair the exhaust pipe myself. I did some research, and this is what I came up with.
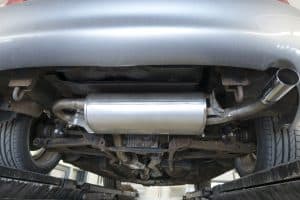
While extensive damage to your exhaust system means a trip to the garage, it’s fairly easy to deal with small leaks yourself. Here are four DIY methods on how to repair the exhaust pipe.
But safety first: before you start, make sure your car is raised up safely, that the exhaust system has cooled down, and that you’re wearing the appropriate safety gear.
Common methods to repair an exhaust pipe:
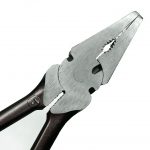
Repairing exhaust holes with a welding machine
This method is the one I’d recommend, because it is a reliable and safe repair. Of course, welding an exhaust pipe requires some expertise with welding equipment.
In many cases it is easier and cheaper to cut off a part of the exhaust pipe and have a new part fixed instead of replacing the complete exhaust system. For smaller holes you could try to weld a patch.
Very likely, you will need to disassemble the exhaust from the car in order to weld it.
Concerning equipment, you will need:
- A piece of exhaust tubing
- A pipe cutter or hacksaw
- A grinder
- C-clamps
- A welder
- Safety clothing
Safety first: Be sure to wear your eye goggles and welding gloves while using welding equipment and be aware of any flammable materials in the area.
The first step is the most important one, as the exhaust tubing needs to be cut neatly and accurately. Measure and mark carefully before cutting with the pipe cutter or hacksaw. Work slowly and carefully as the cut needs to be as straight as you can make it so everything will finally fit seamlessly together.
Clamp the exhaust tubing together using the C-clamps. Make sure they are exactly how you want them before you begin welding.
Go around the circumference of the tubing, applying three or four spot welds. This prevents the tubing from warping and losing its shape.
Now, use the welder to fill in the gaps, continuing over the spot welds you have already made. Make sure you have a 100% weld right around the tubing to prevent further leaks from developing.
Give yourself a pat on the back. You should be proud of fixing the exhaust yourself and saving yourself some bucks. Be aware, though, that home fixes are not permanent, but buying you time and may not be enough to get your vehicle through its next safety inspection.
back to menu ↑Using exhaust tape
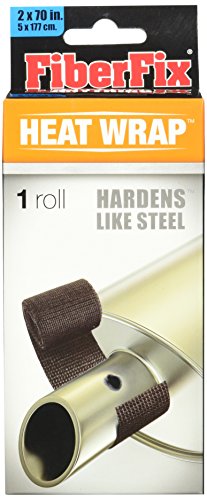
FiberFix Heat Wrap- For Exhaust Pipes and High Temp Repairs, 2"x70".
- 100X STRONGER THAN DUCT TAPE: Fiber Fix Heat Wrap is the solution to all your breaks, tears and cracks. 100 times stronger than duct tape and as strong as steel for a durable and dependable repair.
- BRING ON THE HEAT: The FiberFix Heat Wrap hardens like steel and can withstand temperatures up to 850 degrees Fahrenheit. A great solution for automotive repairs and cracked pipes.
*Affiliate Disclosure / More Information

This method is only suitable for small holes. Large holes need a patch.
You will need:
- a steel brush
- fine sandpaper
- acetone (or nail varnish remover)
- expoxy
- exhaust tape
Scrub the area around the hole thoroughly with the steel brush to remove dirt and rust.
Then go over the area again with the fine sandpaper. Sanding it removes the last pieces of dirt while roughening the surface. Moreover, it makes it easier for the exhaust tape to stick.
Wipe the whole area down with the acetone for a final clean.
Carefully wrap the exhaust tape around the pipe using at least two layers and continuing for a few inches either side of the leak. Different brands of tape may require different application techniques, so be sure to read the instructions carefully. Sometimes, the pipe needs to be slightly warm to ensure a good seal while other exhaust tapes need to be dampened before application.
Finally, prepare the epoxy according to the packet’s instructions and spread evenly over the area of the leak.
Allow the repair to dry and set thoroughly before driving the vehicle.
back to menu ↑The empty beer can method

empty beer can
This is a method I’ve found many DIY people applying, also I do not have experience with it and I’d rather not recommend it.
Who doesn’t have an empty beer can lying around? If you don’t, drink up and then gather together:
- a file
- fine sandpaper
- acetone (or nail varnish remover)
- epoxy
- a razor blade or craft knife, and
- a couple of hose clamps
File off any rust and then use sandpaper to roughen up the pipe’s surface for about an inch around the hole. Wipe the whole area clean with the acetone.
Then, use the razor blade or craft knife to cut two patches from the beer can. One should be slightly bigger than the hole in the exhaust pipe and the second one should be bigger than this but not so large that it wraps right around the pipe.
Next, prepare the epoxy according to the instructions and spread it around the edges of the small patch. Don’t apply too much or it might drip through the hole into the exhaust pipe.
Apply the patch and hold in place until it begins to set.
Put a thin and even layer of epoxy over the first patch. Apply the larger patch and hold in place by securing it with the hose clamps.
Using two patches provides a more secure seal, ensuring your exhaust pipe won’t leak.
back to menu ↑Replace the exhaust pipe
Ok, not quite a real method.
But if you have a real old exhaust system with big holes and many holes, it can be a hazzle to fix it.
If you cannot weld the spot or if there are too many spots, you should consider replacing the damaged parts completely.
Image Credits: Stux / Pixabay, Pixabay